My Maker Journey
|
I came back to school after my medical leave with 2 1/2 weeks of school left. I did meet with the Makers Club one last time. For our last meeting I tried to put the "A" in STEAM by painting with our Sphero robots. The students absolutely LOVED this activity and couldn't believe I was letting them do it. Check our photos below to share in our fun!
0 Comments
I had surgery over Spring Break and will be out of commission for a bit. Stay tuned...Our Makers Faire was a hit! I invited all District 429 families and teachers, the Economic Development Committee as well as other community leaders. There was alot that went into the prep work to make sure the event went off flawlessly. I had posters and flyers made (by myself), emails sent to invite families, purchase snacks, make place cards, develop the night's timeline, make the 3D printed name tags, design and order t-shirts, and organize all the activities that the students would lead for the evening. So, the time has come to showcase what we have been creating, making, tinkering, and playing with after school. I am very excited to have my Makers demonstrate and teach others about what the Makers Movement is. We will be holding our Makers Faire during one of the Parent Teacher Conference evenings. All families and students in the district are welcome. In addition, I am reaching out to local businesses and organizations to build our community ties and welcome them into our school. My Makers are hard at work to finish designing or learning about the topic they will demonstrate. More to come after March 16....... 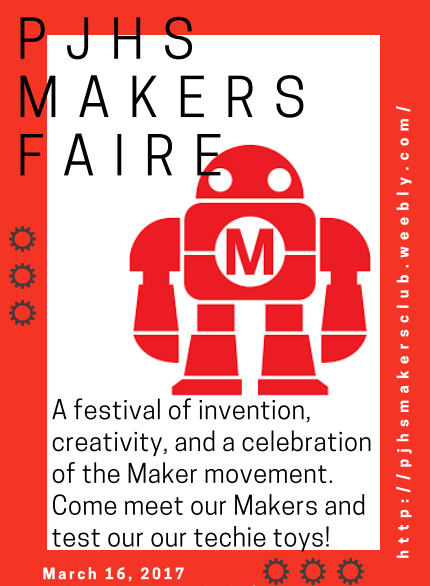 Yes, I did say cassette player. As in the one that plays cassette tapes from the 80s. When I started the Makers Club,I asked for items to be donated from families. Those items could be paper towel rolls, markers, cotton balls, paper, glue, or old electronics. I had a family donate this cassette player that did not work. I put it aside and had forgotten about it until a student asked if he and a few friends could take it apart. "ABSOLUTELY," I said. The group tinkered with the stereo for a few club sessions. Just as we were cleaning up the group asked if they could plug it in and see if it works. This was that moment I envisioned when I wanted to begin a Makers Club-this group of students worked independently and self-driven to solve a problem. I provided the basic tools and they used the internet to investigate. I wish I had the moment video recorded when I plugged in the cassette stereo and IT WORKED! I was amazed and impressed with my Little Makers. The look of joy, accomplishment, and pride was priceless on their faces. Wow, it is the 3D Craze. As soon as I discussed 3D printing, showed a few examples, and the program to design they were OFF! I introduced Tinkercad to the students as a starting point to design 3D objects. Tinkercad is nice because it has already created learning lesson where the user can walk themselves through understanding working in the 3D World. The learning lessons are great for me because I am not in a position to directly instruct this idea in class or after school during club (too may other students to supervise at the same time). However, as I mentioned the students ARE loving designing and printing. I do stop to help the students when they have design questions and we discuss how an object may not print well, but the basics are up to them to explore on their own. I can't wait to take this further with the students next year in a classroom setting! One of the favorites is for the students to try driving the Sphero Spark+ and Ollie. WOW, these little robots can move....up to 14 MPH! I have a few ramps the students like to try and get the robots to jump. Once the students have an idea about how these robots move and how to control them the next step is to introduce them to the programming and coding end. These Sphero products are great! They work with iPads, Chromebooks, and Android devices. Students can use the block programming commands to change their color, speed, direction, and make it do tricks. If I had a dozen of these little guys they would all be in use! After Winter Break, I wanted to give the students some new ideas and things to think about creating in club. I introduced 3D design and printing, a cardboard challenge, and coding of robots. The cardboard challenge began quite strong with the majority of the students wanting to "play" with cardboard. I gave a few suggested ideas to create a maze or obstacle course for our robots or create a game. I noticed the the students who thought out their ideas seemed to stick with the project and work on it multiple days. The students who just wanted to make a.....xyz seemed to give up and never produce a final product. I do have a few great cardboard creations the Makers worked on. From a robot with a light up head, to a skeet ball game, and even a little homestead landscape. Cardboard is free and cheap. I think if I had less other options in club to try out more students would have had the focus to stick it through and create a final product. To wrap up 2016 I brought out the toys. I had finally gotten in some more techie devices and was excited to introduce them to the students and let them…..play. The newest additions to our Makers Club now include: snap circuits, Makey Makeys, Squishy Circuits, a programmable rover (I call him Wall-e), Eve-3 Lego robotics, Dash & Dot, Spark+ and Ollie, Goldieblox, littleBits, and a 3D Lutzbot mini printer. Wow, that’s a lot of toys I myself have had to test out. The students were hooked on this Makers Club! Letting the students explore the new devices, test out what they can do, and troubleshoot on their own is great to see. The teamwork of boys, girls, 6th, 7th, and 8th graders is fantastic. Everyone seems to help out each other. I can’t wait to see what the students can do when we get back from winter break. I have a few new challenges to pose to them. So, for our December meetings I thought it would be fun to make light up holiday and winter cards or pictures. Everything I read online looked easy enough. I researched a little more and practiced with a few designs. I created a little light up tree and even found a great template from Sprkfun that would allow the students to make a 3D house that would light up. I found it was a little tricky to work with the copper tape. It was pretty thin and would bend and crease easily. I found that applying the copper slowly worked best. I had my co-club leader put together a slide show to help the students get started. We presented the task, background info, examples, and turned the students loose. We encouraged them to research more, then sketch up a design, and finally test it out. Most students were so excited to create and make something that they forgot some of the most important ideas to make their designs work. First, many missed the idea of actually using the copper tape to make a circuit and pass energy. Instead, they just sketched out any old path they felt like (instead of a parallel circuit pattern). Luckily, we caught many of those mistakes in the sketched rough drafts. Secondly, we found many of the circuits were not working because the students disregarded the +/- (positive/negative) sides of the circuit. The LEDs needed to be placed on the proper +/- side for the circuit to run. Next time it might be best to do a paper circuit all together to explain the ideas more clearly before the students get to choose their final project. I absolutely LOVED seeing the students cheers and hearing the excitement when their Christmas tree, dragon eyes, or heart lit up! I still really like this idea for students to work with paper circuits. CHALLENGE: Who can create something that will throw a pumpkin the farthest Wow! our first few sessions were busy with students building catapults and trebuchets to see who could research, plan out, design, and successfully create something that would hold a mini-pumpkin and throw it. Not only throw it, but throw it FAR! Students used a variety of tools and items to design their project. Many of the items chosen were: rubber bands, balloons, variety of sizes and shapes of popsicle sticks, hot glue, variety of plastic spoons, metal tins, plastic cups, pipe cleaners, yarn, and many more crafting supplies. Students were able to work alone or with a partner to plan their designs. The farthest design sent out little pumpkin over 20 feet! The top 3 students were able to chose a techie prize for their great accomplishment on our first challenge! So excited to get our club up and running. It has been a lot of researching, writing of grants to secure funding, and planning. Can't wait to share my thoughts and ideas with the kiddos at our informational meeting this week. I have had so many students approach me during the day wanting to know more! ONE week until our first official club meeting. The kiddos are going to absolutely LOVE the fantastically FUN gadgets, tech, and tools I am gathering.
|
Mrs. Christine ChiodoI am a junior high teacher at Pontiac Junior High School. Archives
February 2019
Categories |


 RSS Feed
